Even though there are some free website builders, it is difficult to be satisfied with their features. Welcome to Nehabi – you’ve come to the right place. Whether you’re a business owner, a creative professional, or someone looking to establish an online presence, Nehabi offers an intuitive platform that empowers you to bring your vision to life. We offer so much more than just a beautiful website. Manage your entire business from your Nehabi account, including your contacts, products, services and sales. Promote your business using business emails, social posts and stay up-to-date with your site’s analytics
Follow the steps below to get started with Nehabi
Step 1: Select Nehabi Package
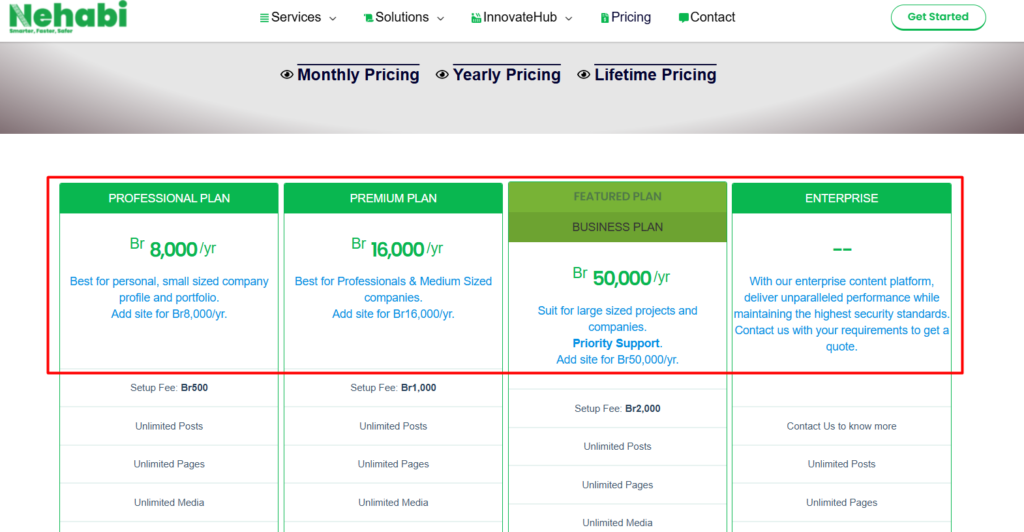
Upon pressing the “Pricing” button, you will be presented with the Nehabi packages. Follow these steps to complete your registration:
- Choose Your Pricing Package: Choose a plan that aligns with your business needs. Nehabi offers various plans suitable for different sizes of businesses.
- Press SELECT Button: Once you’ve decide on your plan, click on the “SELECT PLAN” button to proceed.
Step 2: Choose Your Template
After selecting your Nehabi package, the next step is to choose a template that suits your style and business needs.
Follow these steps to personalize your website:
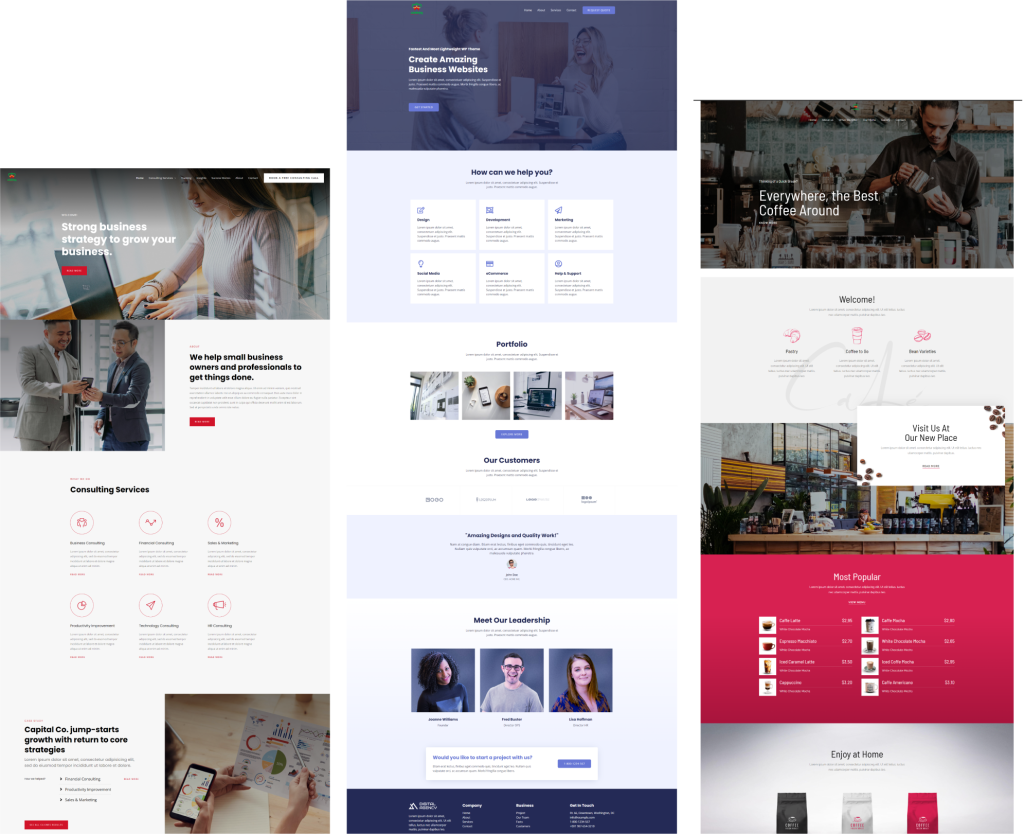
- Press “View Templates”: Explore detail of your chosen website templates by clicking on the “View Templates” This will give you a preview of the diverse designs and layouts Nehabi has to offer.
- Select Your Template: Browse through the templates and choose the one that best fits your vision. You can either click “SELECT” to apply it immediately or continue exploring.
- View the Templates: If you are in the detailed view of templates, simply press the “USE THIS TEMPLATE” button on top right part of your website to initiate the registration process for your website to the next step.
Template Features:
- Diverse Designs: Discover a variety of professionally crafted designs catering to different industries and styles.
- Customizable Elements: Each template is fully customizable. You can modify colors, fonts, and layout elements to align with your brand.
- Mobile Responsiveness: Ensure your website looks stunning on all devices with templates optimized for mobile responsiveness.
- Preview Option: Use the preview option to see how your content will appear with a particular template before finalizing your selection.
- Industry-Specific Templates: Find templates tailored to your specific industry, making it easier to create a website that resonates with your target audience.
Step 3: Register site Info and Privacy Policy
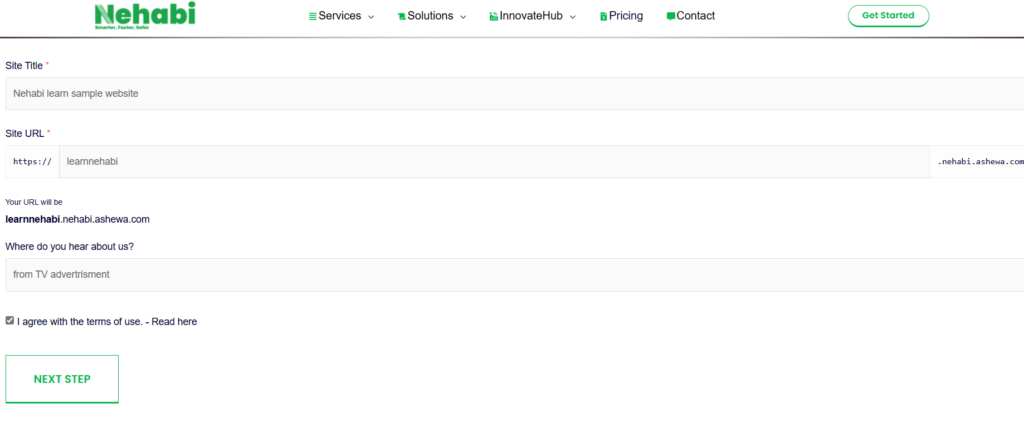
After pressing the “USE THIS TEMPLATE” button, you will be directed to the site info registration form. Complete the following details to personalize your website:
- Site Title: Enter a unique and descriptive title for your website. This will serve as the name that visitors see when they land on your site.
- Site URL or Subdomain: Choose a custom URL for your website or create a subdomain. This will be the address users type to access your site.
- Description: Provide a brief description of your website. This can include a summary of your business, services, or any other information you want visitors to know.
Why Fill Out the Registration Form?
- Personalization: Tailor your website to your business by specifying a title and description that accurately represent your brand.
- Branding: Choose a memorable and relevant site URL or subdomain to enhance your brand identity.
- SEO Optimization: A well-crafted description can contribute to better search engine optimization (SEO), making it easier for people to find your website online.
Note:- site url must be in small later After filling form press “NEXT STEP” button to finalize your registration process
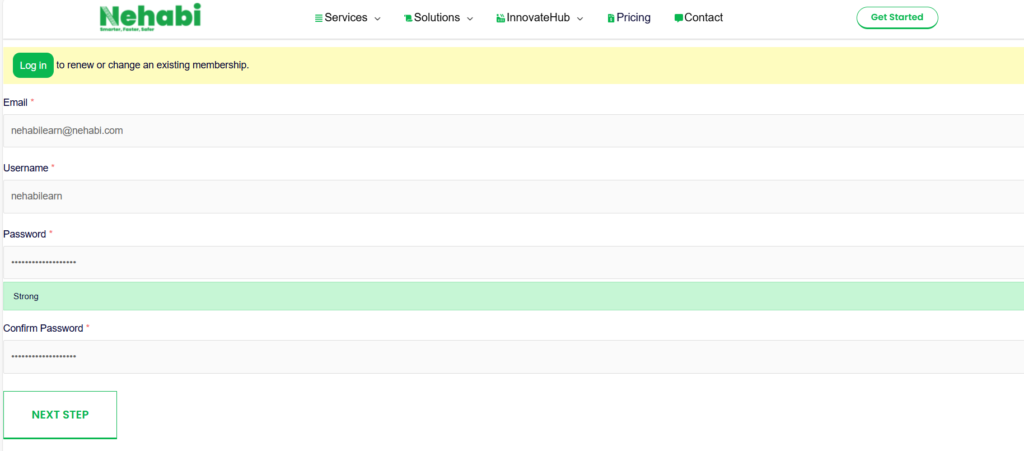
Step 4: User Information and Password Setup
After completing the site info registration form, you will proceed to the next step to set up your user account. Provide the following details:
- Email: Enter your email address. This will be used for account notifications and communication.
- Username: Choose a unique username for your account. This will be used as your login identifier.
Note:- The Username only allows a-z, 0-9, _ and
Use like this username “sample_2”
- Password: Create a strong password for your account. Ensure it meets the password strength requirements outlined below the input field
- Password Strength: Medium (Note: Ensure your password is not weak.)
- Confirm Password : Re-enter the same password to confirm it.
Why is This Step Important?
- Security: Protect your account with a strong password to ensure the security of your website.
- User Identification: The username you choose will be your unique identifier when logging in.
- Communication: The email provided will be used for important account-related communication.
Password Strength Tips:
- Use a combination of uppercase and lowercase letters.
- Include numbers and special characters.
- Avoid using easily guessable information, such as birthdays or common words.
Once you’ve filled out the user information and set a secure password, click on the “NEXT STEP” button to proceed. If you encounter any issues or have questions, feel free to contact our support team.
After filling the form press “NEXT STEP” to finalize the registration step
Step :5 Logo Design Service
Do you have a logo right now? if not, we have a dedicated team with affordable pricing plans and choose your appropriate or contact us for consultation. To continue to the next step click on “SKIP OR NEXT” button.
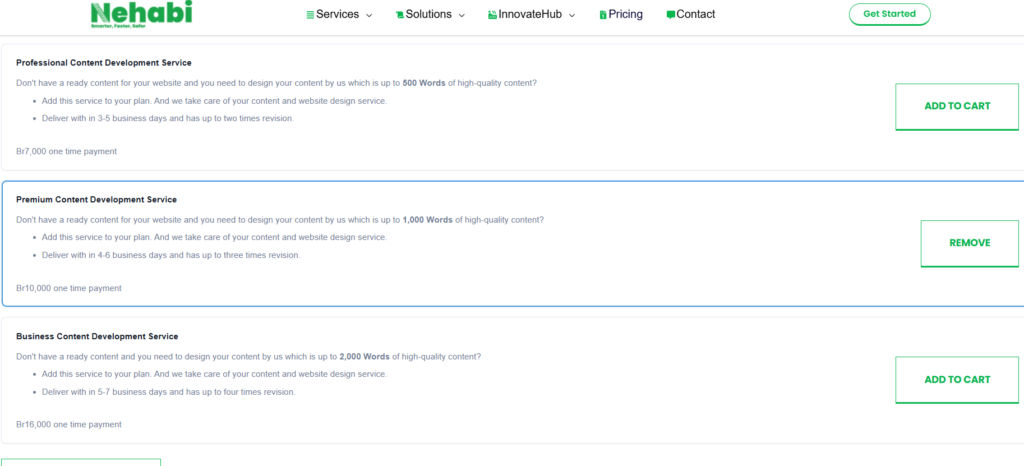
Step :6 Content Development Service
If you haven’t a ready content for your website, we have a affordable pricing plans package with onetime payment and choose your appropriate or contact us for consultation. To continue to the next step click on “SKIP OR NEXT” button.
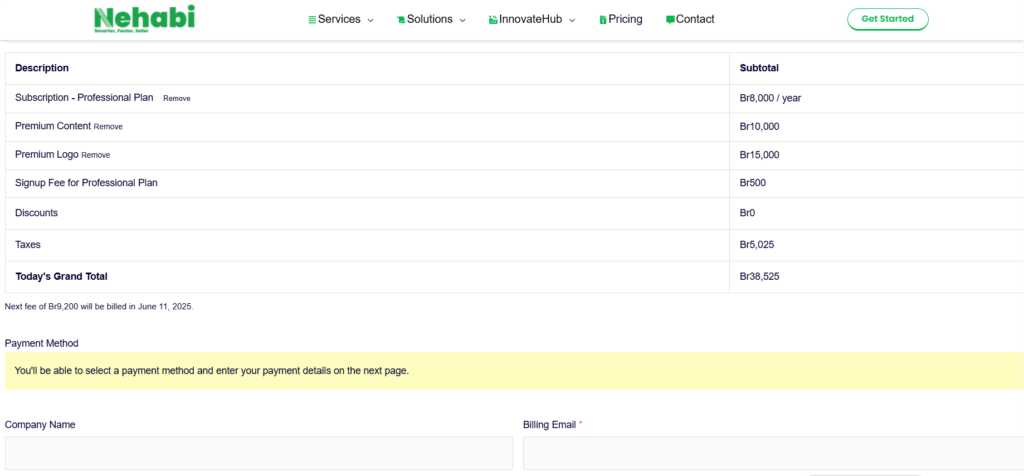
Step 7: Checkout Information
After proceeding from the user information and password setup, you will enter the checkout stage. Here, provide the necessary details to finalize the setup:
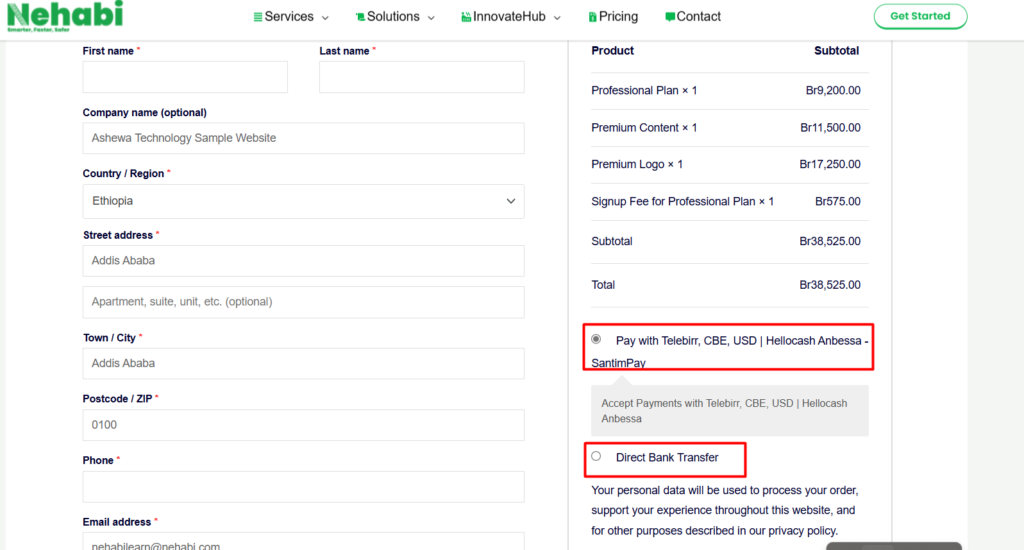
Step 8: Fill payment Information & Choose Payment Method
Fill billing information and choose the payment method. If you choose bank transfer payment method, we will send and email for payment instructions. Your account will be pending until the payment is finalized and confirmed if you choose bank transfer. If you pay with SantimPay i.e. telebirr, CBE, hallocash, Mastercard.., your account is activated after payment successful. Finally click on ‘Place Order’ button.
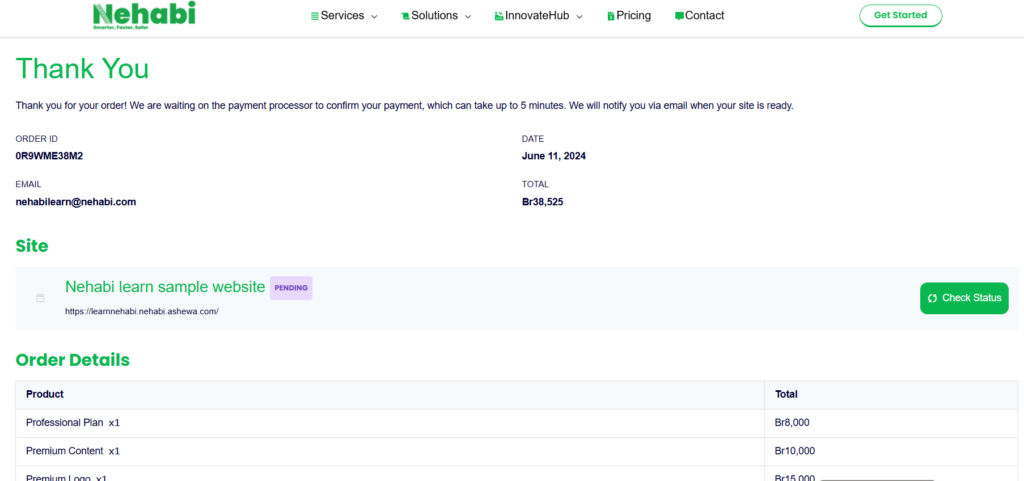
Step 9: Pending Order Confirmation
After clicking the “CHECKOUT” button and completing the payment process, you will be directed to a confirmation page with important information:
- Thank You Message:
- A warm “Thank You” message indicating that your order is placed but waiting for payment approval.
- Transaction Details:
- Order ID: you got order id
- Date: December 8, 2023
- Email: youremail@gmail.com
- Total Amount: total amount you pay for website
- Site Activation Status:
- A notification that your site activation is pending until your payment is verified.
- Email Verification (for Free account only):
- An important reminder to check your inbox for a verification email. Your site will only be activated after successfully verifying your email address.
- Option to “Resend verification email” in case you didn’t receive it or accidentally deleted it.
Payment Instructions:
If you prefer an alternative payment method, you can follow these instructions:
- Account: 9870
- Name: Ashewa Technology
- Banks: BOA, Dashen Bank, Commercial Bank, and other local banks (Almost all Ethiopian Banks).
After making the payment:
- Attach Screenshot: Please take a screenshot of the payment invoice.
- Send via Telegram: Send the payment screenshot through Telegram to the following number: Use This Link
Why Use This Payment Method:
- Local Options: Conveniently pay through widely used Ethiopian banks.
- Flexibility: Choose a bank that suits your preferences from the provided options.
- Verification: Ensure a smooth transaction by attaching the payment invoice screenshot.
Important Note:
- Verification Process: Your payment will be verified upon receipt of the screenshot.
- Contact for Assistance: If you encounter any issues or have questions, feel free to contact our support team through the provided Telegram number.
Next Steps:
- Check your email for the verification email, you got login link to manage your website and website link with registered subdomain, and follow the instructions to activate your site.
- Use your registered username and password to login after activate your account
- If you encounter any issues or have questions, please contact our support team for assistance.
Congratulations on completing the registration process! We look forward to seeing your website thrive on Nehabi. If you have any further inquiries, feel free to reach out to our support team.
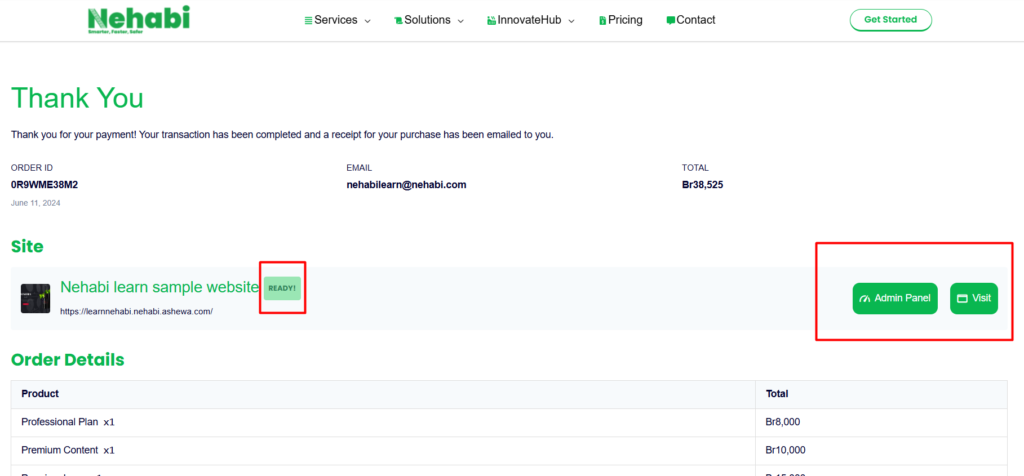
Step 8: Congratulations! If everything is OK, Your website is active and ready for customization.
Now, Your website is ready and you have to receive the confirmation email i.e. ‘Your Site is Ready’.
Have a nice Journey!